Features
Trainer’s Corner: Live fire kit workshop
February 27, 2023
By
Ed Brouwer
 These demonstrations illustrate the basic principles of flames.
Photo: © Steven / Adobe Stock
These demonstrations illustrate the basic principles of flames.
Photo: © Steven / Adobe Stock I thought we’d start the new year off on a bit of a lighter note with a couple of training tips that made my job as an instructor a whole lot easier.
Consider instituting a mentoring program. Much like a big brother or big sister program, pairing up a veteran firefighter with a newbie firefighter will benefit both parties and helps build comradery and confidence. It should also lighten your load.
A good thing to keep in mind when planning your practice nights is that learning is optimized when students are actively engaged in learning. Research I’ve reviewed shows that most of us remember:
- 10 per cent of what we read (taking turns reading training material)
- 20 per cent of what we hear (lecture)
- 30 per cent of what we see (video)
- 50 per cent of what we both see and hear (power point and lecture)
- 70 per cent of what we have discussed with others(brain storming)
- 80 per cent of what we have experienced personally (hands on)
- 95 per cent of what we teach someone else (helping instruct)
Another important consideration that plays a big part in learning styles is gender. Listening to parents interacting with their children you will most likely hear a mom say, “Listen to me, and I will tell you how to do this.” Whereas a dad will most likely say, “Watch me, and I will show you how to do this.” Finding the balance between spoken instructions and demonstration is the key. The Three “D” system (describe, demonstrate, do) seems to work well.
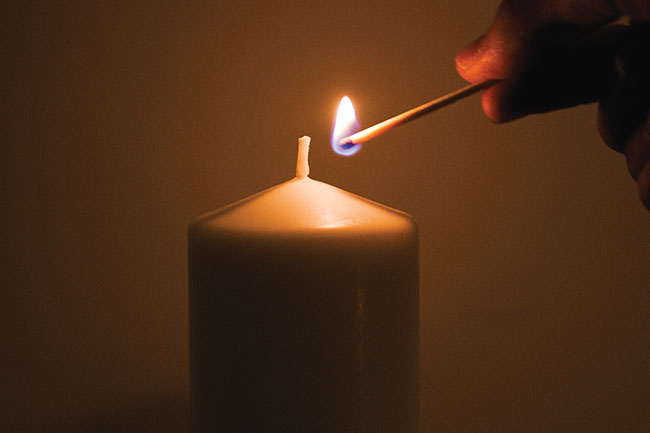
One of my favorite training sessions for this time of year involves live fire. Well, don’t get too excited, the flames are on candles. Nevertheless, the session is hands-on and provides many opportunities for firefighters to get engaged.
This practice works best with small groups of four to five firefighters with each group at a workstation.
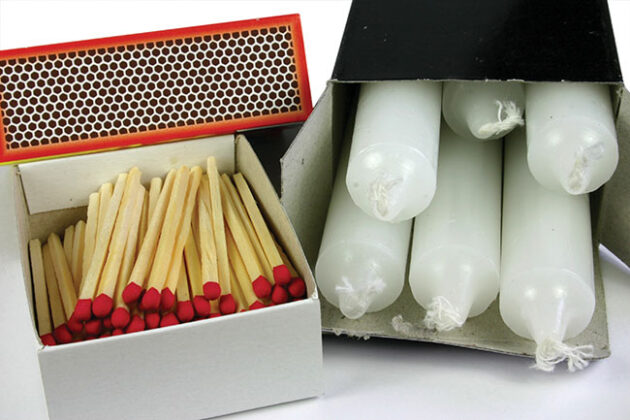
Each workstation should be equipped with the following: a bottle of water, a few sheets of paper, and a live fire kit.
Live fire kits include several candles (the large emergency type), a few books of matches, several short pieces of metal rod (like eight-inch sections of metal coat hanger), several eye droppers, several long wooden matches, aluminum foil or a pie plate.
Once your practice is concluded, save all the fire kit props. I have kept enough props for 20 firefighters in small case for over 25 years. It is a quick go-to tool for those rare occasions you have nothing prepared.
Before letting your students play with fire, take a few minutes to set the stage by sharing the following:
“Tonight, we are going to experiment with candles. We will try and repeat some of the experiments created by the nineteenth century scientist, Michael Faraday. Faraday said, “the candles’ flame provides most of the essential features of natural fires and a diffusion flame. There is no better, there is no more open door by which you can enter the study of natural philosophy than by considering the physical phenomena of a candle.”
These experiments were presented at the Royal Institution in London as a science show. Known as the Christmas lectures, they are remarkable in their simplicity, yet powerful in their illustration of the basic principles of flames.
Getting started
Instruct each group to lay out the items in their live fire kits. Then lay out a sheet of aluminum foil (or a pie plate) and then light the candle. Once the candle is lit, let hot wax drip onto the foil (making a little puddle) then set the candle upright on that hot wax.
Now have each group take a few moments and observe the processes that created the sustained flame. Encourage them to discuss their findings amongst themselves, writing down what they feel to be relevant points.
After a few minutes, ask groups to share their findings. They should have noted several things. The yellow and blue zones constitute the flame. The blue zone indicates premixed flame (the fuel and oxidizer are mixed before reaching the flame). The yellow zone indicates a diffusion flame, only fuel is supplied. The oxidizer is supplied from the ambient air and the mixing and combustion reactions take place together. Diffusion flame temperatures are lower than premixed flames because incomplete combustion releases less heat.
If the response is slow, you can ask some leading questions such as:
- What is the purpose of the wick?
- Why is the wick curved at the tip?
- What is burning?
Just so you can be the smartest one in the room, I will tell you that the wick is designed to curve so that the flame “clips” off the wick and limits its height. The wick stays basically the same length throughout the life of that candle.
There is so much to learn from a simple candle.
Photo: © CreativeFire / Adobe Stock
Here is how it works
The heat of the flame melts the wax; the melt soaks the wick (by capillary action) and supplies the fuel gas to diffuse into the luminous zone where it finds oxygen having diffused from the other side.
If you look closely, you will see the flame is hollow.
Get each group to experiment with the candle regarding the three methods of heat transfer. Take one of the long wooden match sticks (unlit) and slowly bring it to the side of the candle flame (do not touch the flame). Take note how long you can hold it there before the match head ignites. Now take a new match slowly bring the match head down onto the candle flame. Take note how quickly the match head ignites. You’ve just demonstrated the difference between radiation and convection.
Before putting the long matches away, take one and light it. What happens when the match head is straight up? What happens when you hold the match at a 45-degree angle? And what about when the match head pointing almost straight down? We call that rate of spread.
By holding one end of the small metal rod with your fingers and placing the other end into the flame you can quickly come to understand conduction. (The law of hot to cold)
Now take a sheet of white paper, hold it flat and drag it slowly through the flame (cut right through the flame). Be careful not to let the paper ignite. What is collected on the paper?
Now look at the paper, you should see some dark circles. These are unburned fuels in the form of soot, that were collecting in the smoke because you were “cutting the flame” and not allowing a clean burn. The reason the circles are darker around the edges and almost clear in the center shows the candle flame is hollow.
If you need to, relight the candle. Now insert a glass eye dropper into the hollow area around the wick. Extract the air next to the wick, you should see a white/light grey smoke filling the tube. Squirt this white gas across the top of the flame. It should ignite and look a bit like a small flame thrower. Try it a few times.
Have each group relight their candles. You will need them again in a moment, but first getting back to the last experiment ask each group to answer the following questions.
- What was gathered into the tube?
- What happened when you squirted those gases into the flame?
- What does that tell us about the hollow area around the wick?
When you have concluded that discussion, have each group gently blow out one of their candles. Have them describe the colour and character of the smoke that comes from the wick.
Have them pay close attention to your instructions; get one person in the group to light a match, have another gently blow out the candle flame on another candle. Bring the lit match into the white smoke (do not touch the wick) the flame should jump though the smoke to the wick – relighting the candle.
Not just a great party trick but understanding these results could be life-saving information.
The unburned fuels in the white / cold smoke readily ignite as a heat source is introduced. Consider that for many years we were told that “white” smoke was not dangerous. It is important to realize that smoke can be ignited after collecting away from the point of origin.
Cold white/grey smoke can be ignited if the conditions are right, and that result can be devastating.
There is more information to gain from using the simple candle, but for now this will give you lots of material for both hands on and brainstorming. I hope these experiments will be great conversation starters for your members.
Until next issue – remember to train like lives depend on it because it does. I beg you… let no firefighter’s ghost say his/her training let them down. 4-9-4 Ed Brouwer.
Ed Brouwer is the chief instructor for Canwest Fire in Osoyoos, B.C., retired deputy chief training officer for Greenwood Fire and Rescue, a fire warden, wildland urban interface fire-suppression instructor and ordained disaster-response chaplain. Contact aka-opa@hotmail.com.
Print this page