Features
Training
Back to Basics: Hose packs part 3
February 21, 2024
By Mark van der Feyst
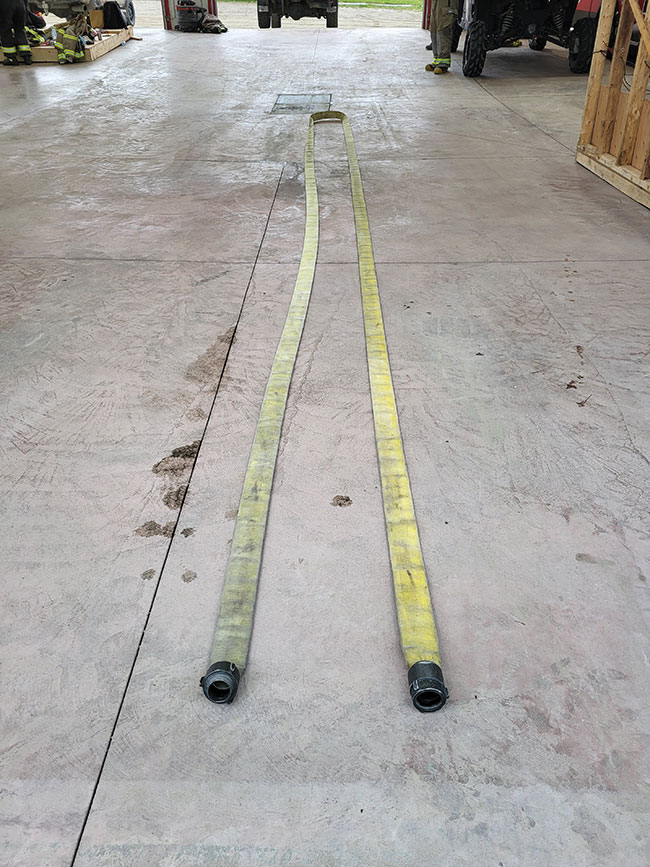 Photo 1
The hose is laid out in a “U” shape fashion after taking one of the coupled ends and walking it up to the other coupled end.
PHOTOs: MARK VAN DER FEYST
Photo 1
The hose is laid out in a “U” shape fashion after taking one of the coupled ends and walking it up to the other coupled end.
PHOTOs: MARK VAN DER FEYST For the last two issues in 2023, we began looking at the three different hose loads that are commonly used for any standpipe operations – giving them the name of high-rise or standpipe hose packs. If you recall back to our first article, we detailed the reason for calling them hose packs instead and listed the three types that are available. We have come to the third part of our series with a look at the Chicago load.
The Chicago Load
The Chicago load is not a popular or very well-known hose load in the fire service. In fact, it is a very well-kept secret.
This load is obviously used by the Chicago Fire Department and has been proven to be very effective for their operations. Just like the Denver and New York loads, there are three hose sections that are arranged and bundled separately, using two hose straps to secure it.
In photo 1, the hose is laid out in a “U” shape fashion after taking one of the coupled ends and walking it up to the other coupled end. It does not matter which coupling you grab as long as both couplings are sitting side by side as in the photo.
The next step is seen in photo 2. This is where the middle of the hose is walked up to the two couplings right down the middle of the two hose sections. The hose will end up sub-divided into two “U” sections. The hose orientation is important here with respect to the twisting of the hose. Notice in photo 2 that the hose is not twisted on its standing edge. If the hose is twisted, then this can be fixed easily at the end when we get to the photo 5 stage of the process.
In photo 3, we are then taking the middle of the one sub-divided “U” section and walking it right down the middle of the one coupling and the one loop sitting beside the coupling. When completed, you will have one coupling and two loops sitting beside the coupling.
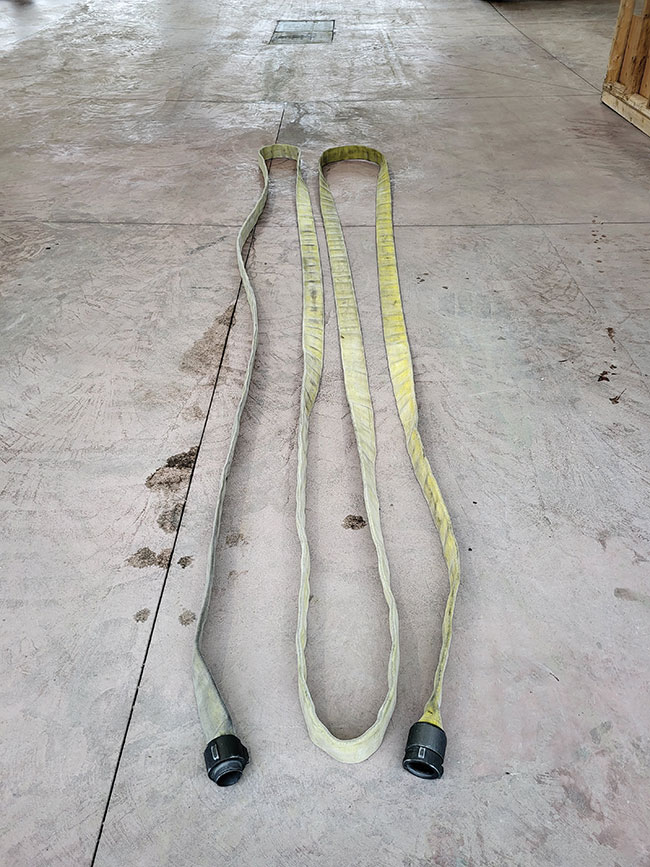
Photo 2 If the hose is twisted, then this can be fixed easily at the end of the process.
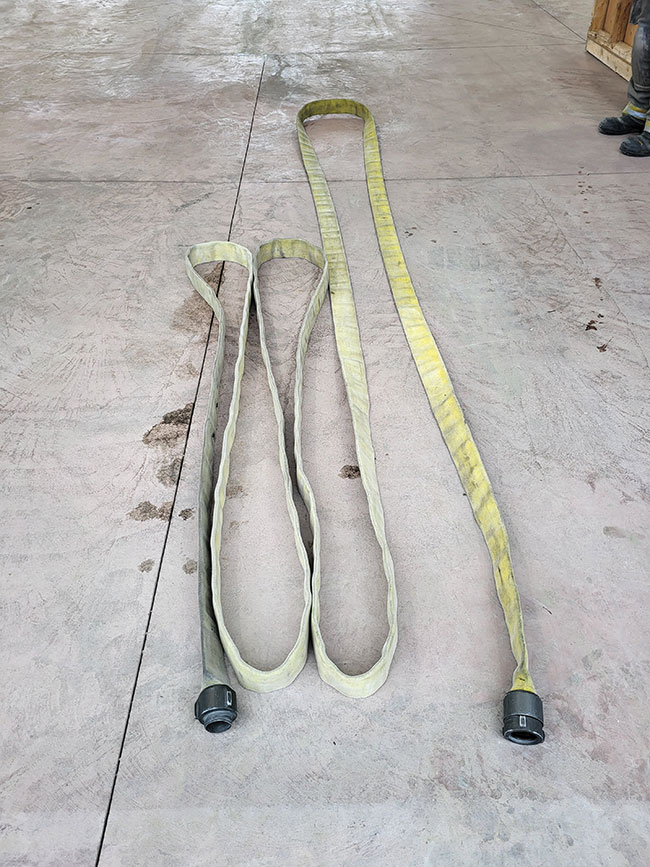
Photo 3 Take the middle of the one sub-divided “U” section and walk it right down the middle of the one coupling and the one loop sitting beside the coupling.
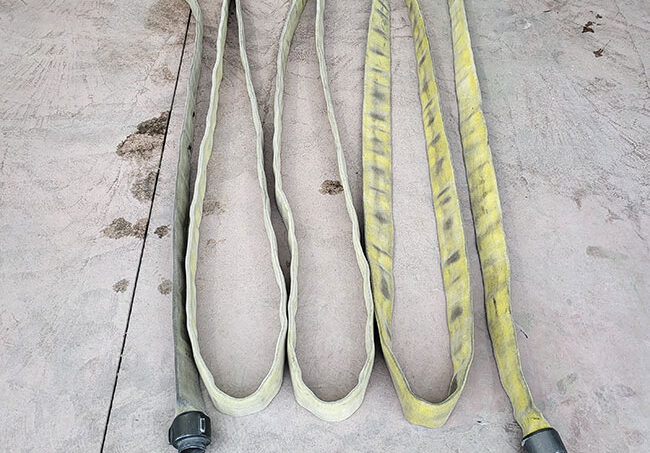
Photo 4 The hose load will be sitting loosely with four loops at the top end opposite the couplings and there will be three loops sitting in between the two couplings.
In photo 4, the same steps are repeated as detailed for photo 3. When completed, the hose load will be sitting loosely with four loops at the top end opposite the couplings and there will be three loops sitting in between the two couplings.
Once the hose has been folded into the proper folds as in photo 4, the load can be finished by the one firefighter. All they need to do is to kneel in the middle of the hose load on the side of the hose, reach out and gather the hose sections and pull them toward their knees.
As pictured in photo 5, the folds of the hose are now packed tight to each other and are all orientated in the same direction to be stacked flat on its edge. If there is a twist in the hose, the firefighter needs to chase this twist down by untwisting the hose and follow that same untwisting back to the one coupling.
At this point, the hose load can be strapped with two hose straps at each end of the load as shown in photo 7. This will be repeated two more times to create three sections in total with one of the sections having the nozzle attached to it.
Putting the hose load into use
When these hose sections are brought into a building or are going to be used for another purpose, they are placed on the ground and laid side by side as shown in photo 7. The three sections will be connected to each other with the couplings from each bundle. If there is a bundle that has the same sex coupling facing each other, the hose bundle can easily be flipped over so that the opposite coupling is now facing the right coupling for threading. This flipping of the hose bundle will not change the process for deploying the load but will allow for a quick correction.
In photos 6 and 8, you will see the main deployment loops of each hose section or bundle. The firefighter will grab the two inside loops at the top end opposite the couplings and pull them, deploying the hose. The two outside loops are the “ears” of the load and are left alone.
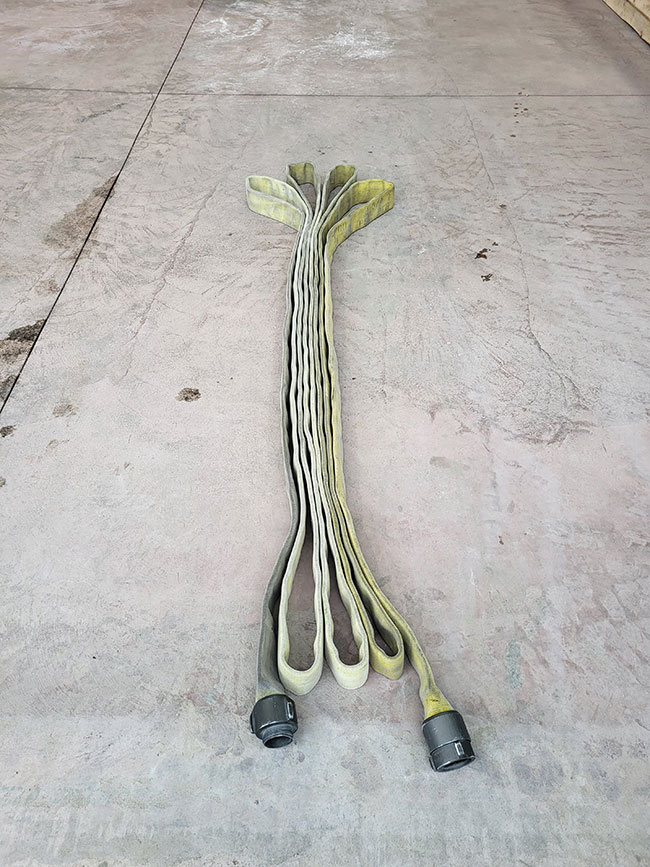
Photo 5 The folds of the hose are now packed tight to each other and are all orientated in the same direction to be stacked flat on its edge.
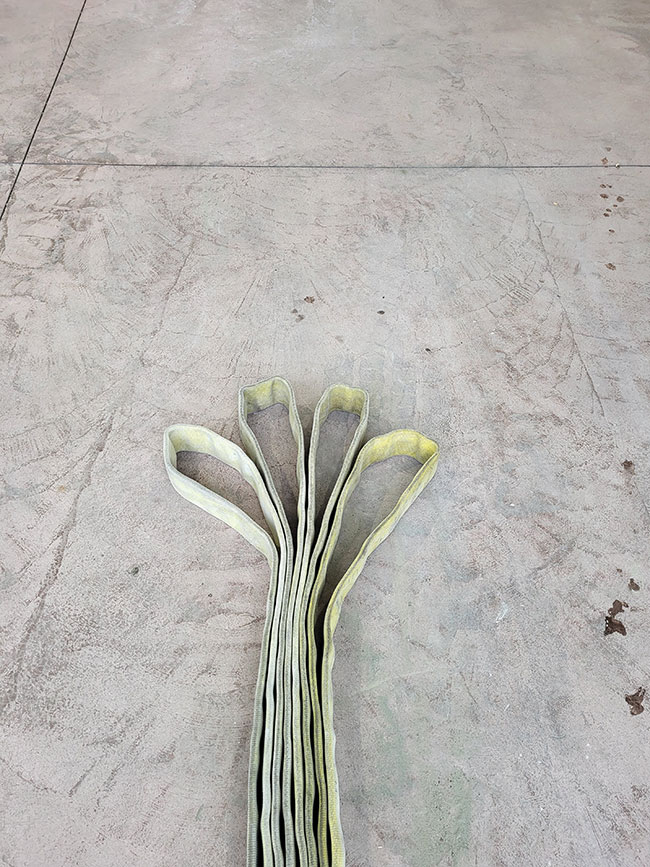
Photo 6 The two inside loops at the top end opposite the couplings can be pulled to deploy the hose.
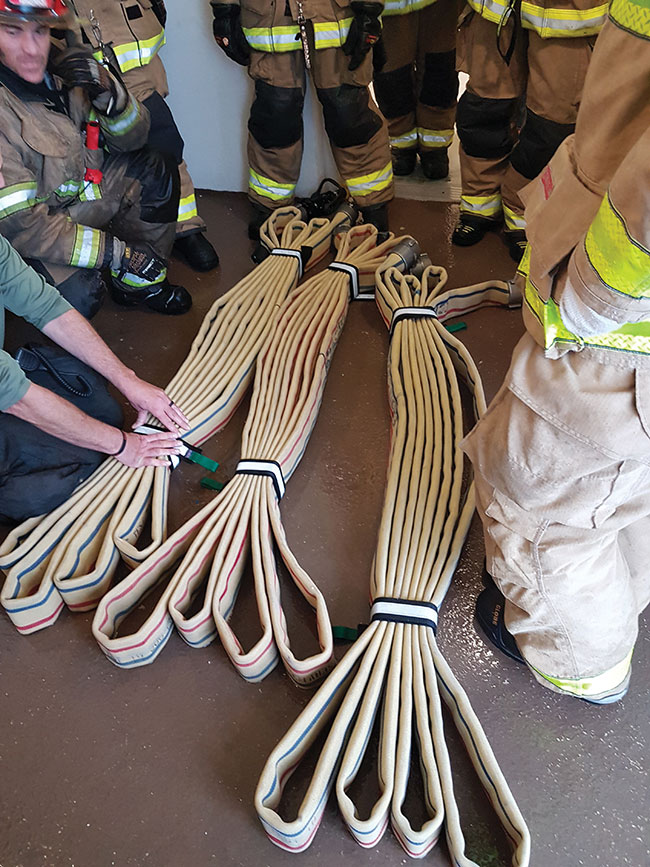
Photo 7 The hose load can be strapped with two hose straps at each end of the load.
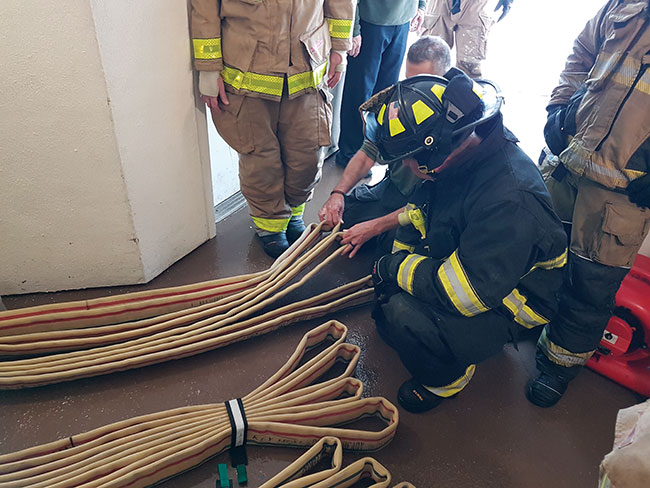
Photo 8 This hose load can be accomplished by one firefighter, which is an advantage when needing to create three sections.
As described with this hose load, it can be accomplished by one firefighter which is an advantage when needing to create three sections.
One of the other advantages of the Chicago load is that it can be carried over the shoulder easily by flopping half of the load on each side. It can also be carried over the back of a SCBA cylinder providing for hands-free operation.
Another advantage is that it can be folded in half for storage in a truck compartment or placed on the floor of an elevator to stand on for space limitations.
One of the disadvantages is the length of the hose load. The Chicago is longer than the Denver or New York loads when it comes to storing in a compartment. If the hose load cannot be folded in half for storage, it must be laid flat requiring more room. If the hose load can be folded, it can be stored like the Denver load flopped over a round object vertically in a compartment.
The Chicago load provides a simplistic approach to packaging and deployment for hose packs needed for other operations besides pre-connected hose lines.
Mark van der Feyst is an international instructor and firefighter with FGFD. He is the lead author of Fire Engineering’s Residential Fire Rescue & Tactical Firefighter books. He can be reached at Mark@FireStarTraining.com.
Print this page